Changing colours in virtual sets
posted by
All of our studio sets are designed so that you can easily adjust the colours yourself.

The coloured lighting elements are all provided as separate layers in the Photoshop file, making it super easy to change the colours to create infinite variations of your own!
Studio 1 example
For example, Studio 1 comes supplied with the main feature colour as a pure red (as in the bottom right image below). The lightboxes, neon strips and desk lighting (and the coloured pillars) are all provided as separate layers in the Photoshop file so you can change each one independently of the others.
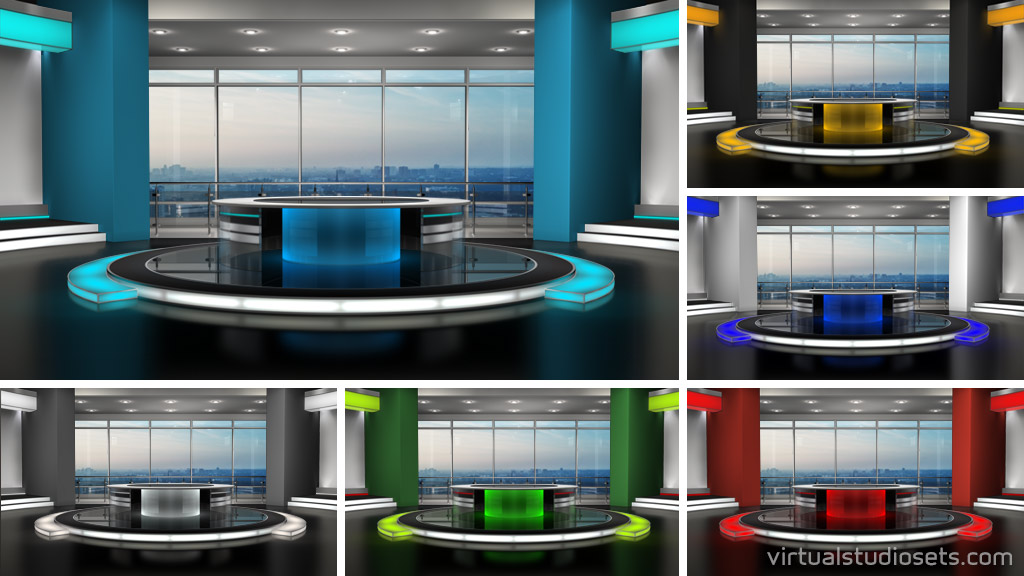
Adjusting the ‘hue’ is easy in Photoshop, and pretty much any other graphics package. This will change the red bits to a different colour and everything else on that layer stays much the same. We suggest trying Image > Adjustments > Hue/Saturation and then moving the Hue slider until you find your ideal colour. If you want to adjust the brightness too then you can try the Lightness control, but you might see better results using Curves or Levels instead.
Experiment! See which looks best! Provided you have backed up your files, you can play around as much as you like, and can always revert back if you need to.
We’ve made a separate guide for TriCaster users because Vizrt’s (formerly NewTek’s) Virtual Set Editor handles ‘Hue’ adjustment slighty differently to Photoshop. See Changing TriCaster virtual set colours in NewTek’s Virtual Set Editor.
vMix versions
What about the vMix versions? Since vMix currently has a limit of 10 layers per virtual set, in some cases we have had to merge several layers into one single ‘midground’ layer. If you have purchased one of our ‘vMix + Photoshop’ bundles then you’re OK – you have access to the original Photoshop file where all those layers are still separate and adjustable independently! (See Changing colours in a vMix virtual set using the Photoshop version).
Wherever possible we’ve tried to include as many separate layers as we can in the vMix versions. So, for example, the vMix versions of Studio 5 also have the carpet, and the feature wall colour as separate layers, so you can colour correct them, or turn them off completely if you like.
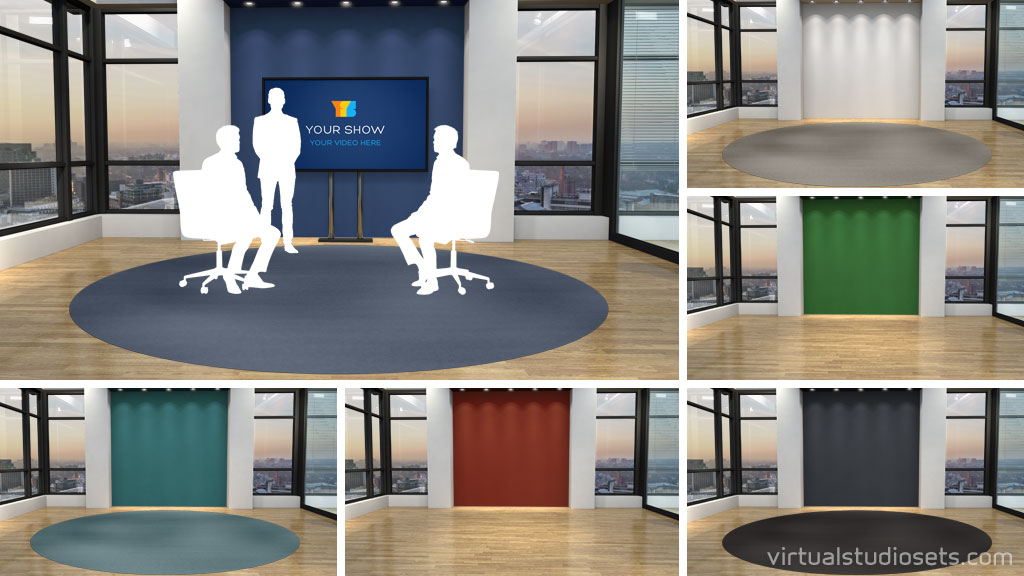
Even if you have just the vMix version on its own, it’s still worth taking a look inside the folder of images to see what’s available.
For a set like Studio 1, you can still adjust the ‘midground’ layer. Since the rest of that layer is mostly neutral (black, white, greys, or transparent) then changing the hue will only really affect the red bits anyway. It’s just you’ll be changing ALL the red areas by the same amount. In Studio 1, this means that the lightboxes, pillars, and neon strips can still be changed from red, to another colour, quite easily. And you have the desk as a separate layer, so you can still get some very nice results. Of course, having access to the original Photoshop file gives you access to All the layers, and even more possibilities!
Even more control
Returning to first image at the start of this post, you can see a close-up of the lightboxes from Studio 9 which we’ve quickly adjusted to show you the kind of effects you can achieve. Notice how the reflections in the floor are all still accurate too!
A number of our virtual sets (Studio 4, Studio 9, Studio 9B, Studio 9C and more) give you two layers for the lightbox colours. You can adjust each one in turn to create some really nice subtle variations by changing the hue of each lightbox layer slightly differently, and maybe even changing the blending mode.
Anyway, we hope that helps give you an idea of how versatile our sets are, and how you can create multiple variants of each one – perhaps for different clients of your own. As always, if you have any questions, please do get in touch.