Customization options for Studio 9 (vMix versions)
posted by
We’ve had a couple of enquiries asking if it was possible to change the skyline image in the vMix versions of Studio 9 and Studio 9B. The answer is yes! It’s easy!
ALL our vMix sets have dynamic layers for the screens and also the skyline outside the window.
This means you can easily select your own source input from within vMix itself.

Once you’ve loaded the virtual set into vMix you click the ‘Setup’ button and you’ll see a dropdown menu for all the layers in the virtual set. Take a look at the image above which shows the ‘wide’ angle. It has 10 layers in all – the skyline is layer 1. Select that layer in the dropdown menu and then choose whichever Input source you want from the ‘Input’ dropdown below it. If at any point you want to revert to the original example skyline, just select ‘none’ from the Input menu and it will show the (supplied) skyline image again.
You can do the same with the screens – the left-hand screen is Screen 1 (which is layer 3) and the right-hand screen is Screen 2 (layer 5). Just select the screen from the Layer menu and then select its source from the ‘Input’ menu.
You can also turn off layers if you don’t want them. So, for example, you can remove the desk completely if you don’t need it.
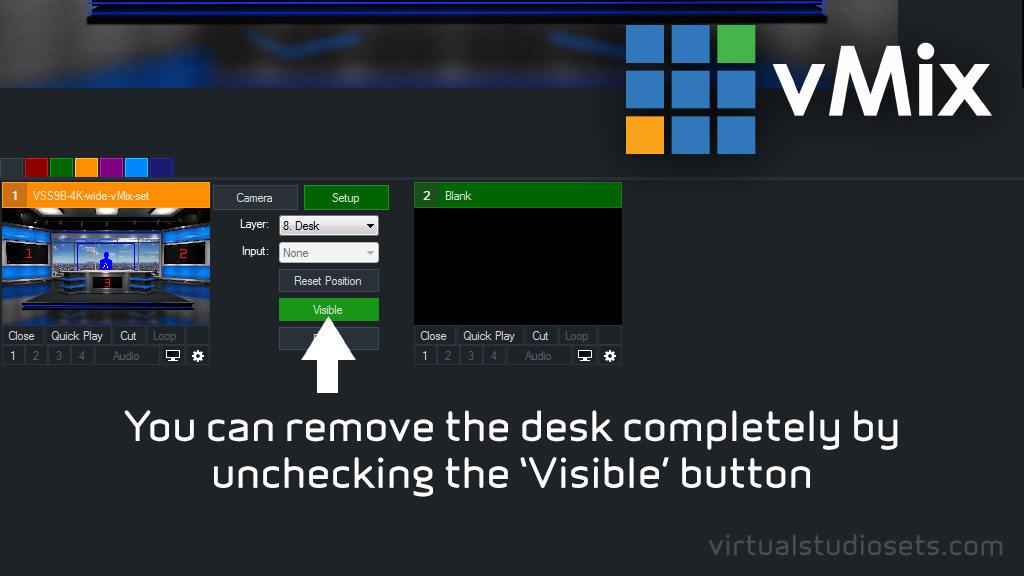
Just select the Desk layer (layer 8) and then uncheck the ‘Visible’ button to hide it. You’ll also need to hide layers 9 and 10, as these are the layers that provide the screen on the desk (Screen 3) and the edging around it. So you could always keep the desk, but lose the screen on the front.
Just for the record – ALL the virtual sets on this site that feature a skyline outside a window will have dynamic layers in the vMix versions that will allow you to replace the sky with your own image or video.