Church virtual set: Removing the lecturn in vMix
posted by
We’ve been asked to explain how to remove the lecturn in the vMix versions of Studio 12. You might want to do this if you’re using a real lecturn or pulpit, and just want to see the church background, but not the ‘virtual’ lecturn.
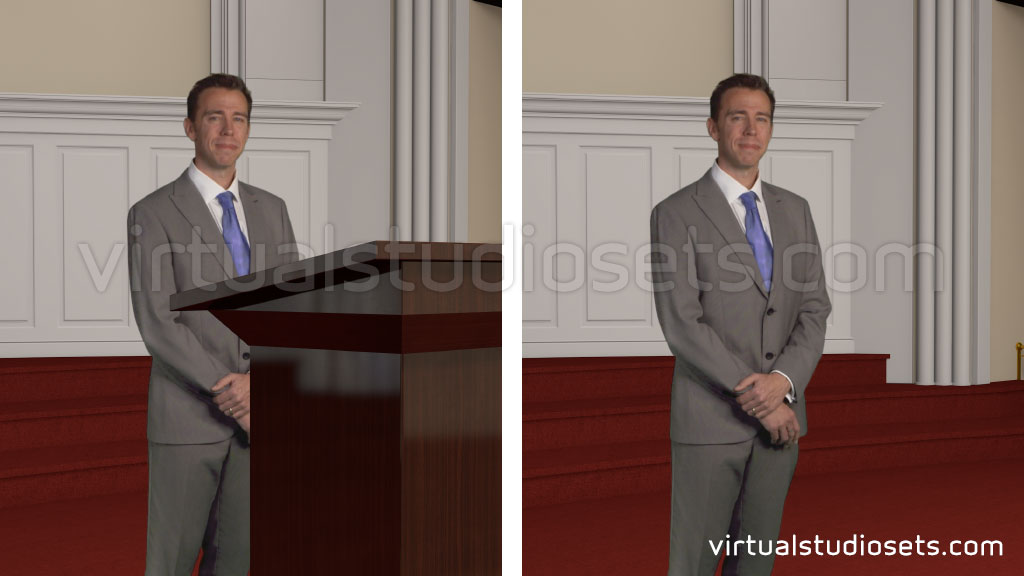
This tutorial describes how to hide a vMix layer, and also how to change the size and position of a layer. You can do this for any of our virtual sets, not just Studio 12!
The lecturn is a separate layer of course, and it’s very easy to access any of the layers if you’re using vMix. You can remove any layer with just three clicks…
Removing virtual set layers in vMix :

1) Click the ‘Setup’ button. You’ll see a dropdown menu appear called ‘Layer’.
2) Select the layer you want to hide. In this case, it’s the layer named ‘Lecturn’.
3) Click the ‘Visible’ button to toggle between visible (green) and hidden (grey).
Changing size and position of virtual set layers in vMix :
One thing you might want to do is to re-size your main talent layer. By default it is scaled down to sit nicely behind the lecturn, but it is very easy to make it full-frame again.
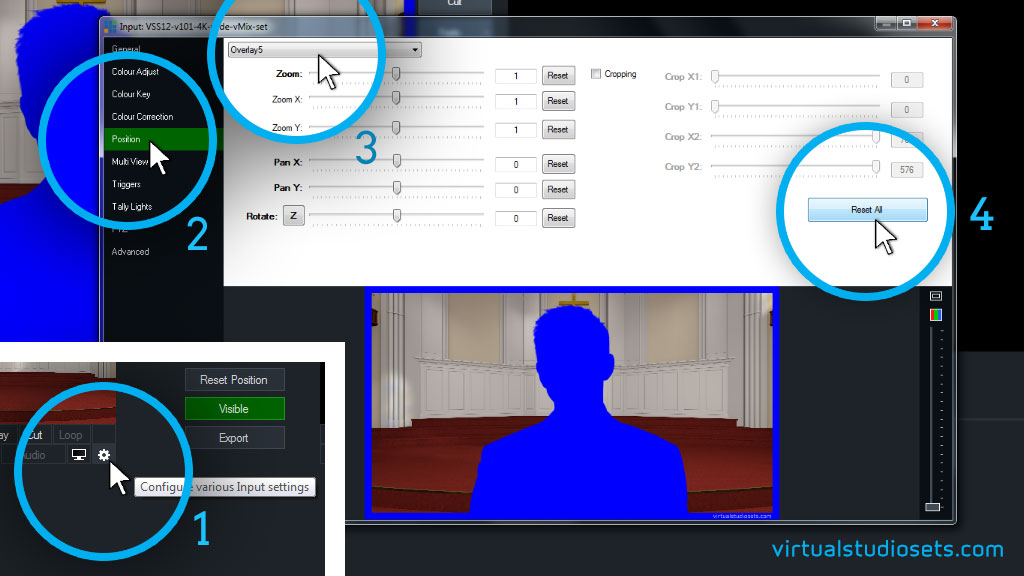
1) Click the little ‘cog’ icon below the preview image. (If you hover over the icon you might see a tooltip appear saying ‘Configure various Input settings’). A big window will pop up with all the various options available to you.
2) Select ‘Position’ from the menu on the left.
3) Choose the layer you want to adjust from the dropdown menu at the top. You’ll see a list of all the available Overlays listed in order (where Overlay 1 will be the layer at the back). In this case, our main Talent layer is actually Overlay 5. You might notice we’ve included a few ‘spare’ Input layers which will allow you to add more overlays behind, or in front of the main talent layer.
4) You can move any of the sliders to zoom (scale) or pan (position) the selected overlay. Or you can simply press the ‘Reset All’ button to reset the everything back to full frame.